
If you’ve ever stood in the meat aisle, puzzled by a package labeled “beef chuck riblets,” you’re in for a treat. You’ve stumbled upon one of beef’s best-kept secrets—a cut brimming with rich, beefy flavor just waiting to be unlocked. Forget everything you think you know about tough meat; this beef chuck riblets recipe delivers incredibly tender, succulent, fall-off-the-bone results using a simple, foolproof oven technique that will make you look like a culinary genius.
Get ready to transform this humble cut into a melt-in-your-mouth masterpiece that will have everyone reaching for seconds. This is more than just a set of instructions; it’s the ultimate guide to perfecting this specific cut.
What Exactly ARE Beef Chuck Riblets?
This is where most resources fall short—they fail to explain what you’re actually cooking. Let’s clear that up before you even preheat your oven. Beef chuck riblets, sometimes called “finger ribs,” are cut from the beef chuck primal. This is the shoulder area of the cow, a hard-working muscle group known for its incredible marbling and deep, beefy flavor.
It’s crucial to distinguish them from their more famous cousins:
- Beef Short Ribs: These are typically meatier, thicker, and come from the lower part of the rib cage (the short plate).
- Beef Back Ribs: These are what you get when a butcher cuts a prime rib roast, leaving you with long bones that have less meat on top but delicious meat between them.
Chuck riblets have a fantastic fat-to-meat ratio. That marbling and connective tissue are your best friends; when cooked low and slow, they break down into luscious, juicy tenderness. This is why a specific slow cook beef ribs in oven method is essential, and our beef chuck riblets recipe is tailored perfectly for it.
Why This is the Best Beef Chuck Riblet Recipe
We’ve tested and tweaked this method to perfection. Here’s why this riblets recipe stands out as the definitive guide:
- Specifically for Chuck Riblets: This beef chuck riblets recipe is designed for the unique fat and collagen content of this cut, ensuring they become perfectly tender, not tough or greasy.
- Simple, Pantry-Staple Ingredients: You don’t need to hunt down exotic spices. This recipe uses common ingredients to create an uncommonly delicious flavor.
- A Foolproof Method: Our wrap-and-bake technique is the secret weapon. It traps steam, essentially braising the ribs in their own juices, guaranteeing tenderness every single time. It’s the ultimate method for oven riblets.
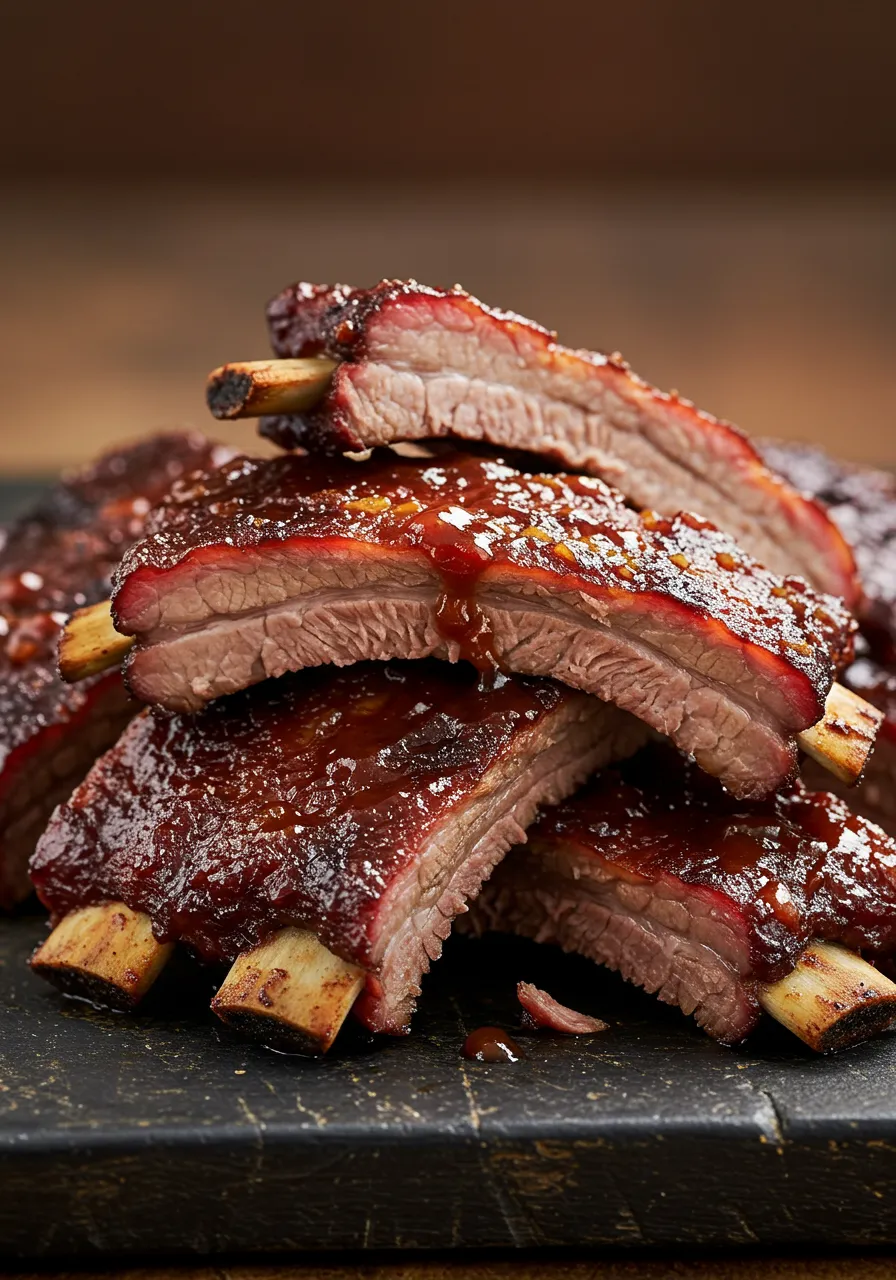
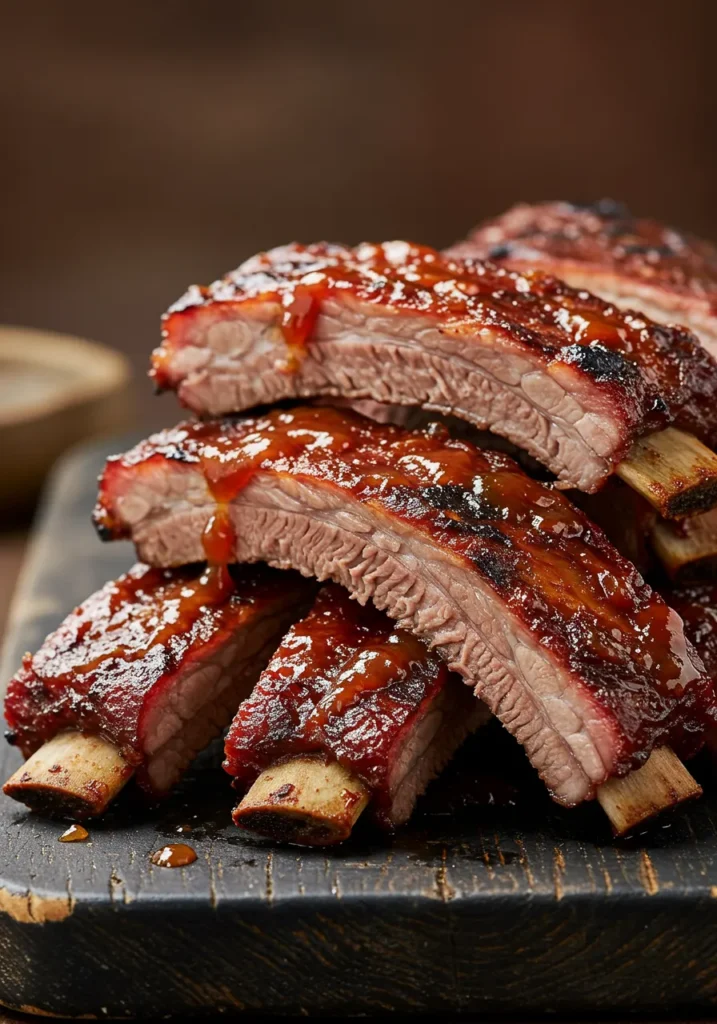
- Incredibly Flavorful: We build layers of flavor, starting with a savory dry rub and finishing with a sweet and tangy BBQ glaze that caramelizes into a sticky, irresistible coating.
Ingredients For This Beef Chuck Riblets Recipe
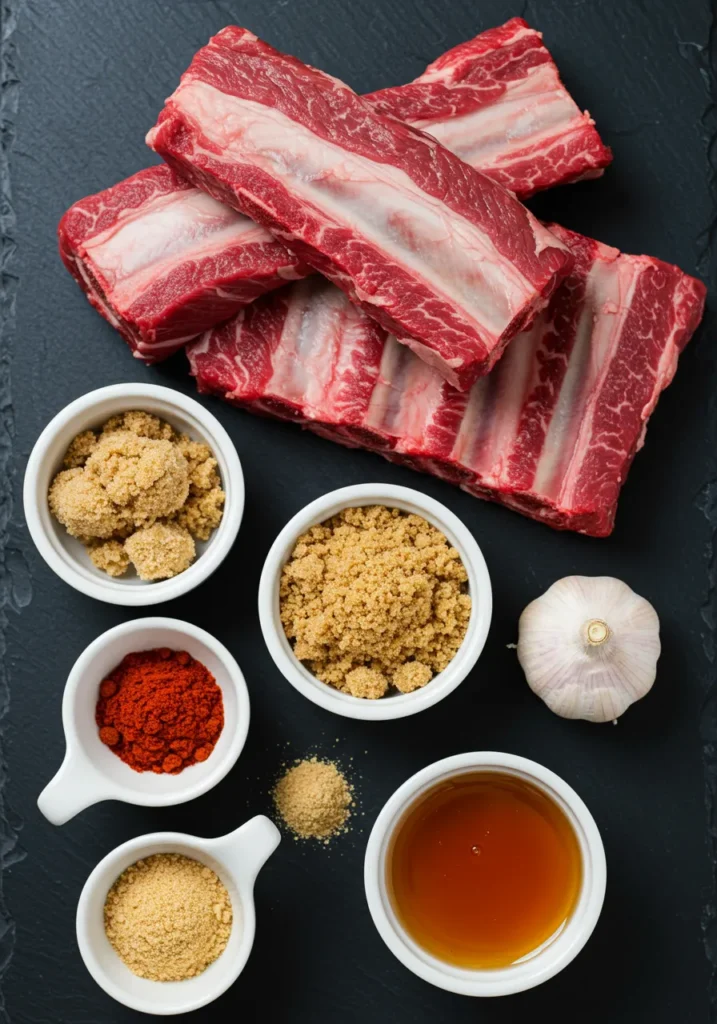
Simplicity is key. We’re focusing on quality technique over a complicated ingredient list.
For the Riblets:
- 3-4 lbs beef chuck riblets (often called “finger ribs”)
- 2 tablespoons olive oil
For the Simple BBQ Rub:
- 1/4 cup brown sugar, packed
- 2 tablespoons smoked paprika
- 1 tablespoon black pepper, coarsely ground
- 1 tablespoon garlic powder
- 1 tablespoon onion powder
- 2 teaspoons kosher salt
- 1 teaspoon chili powder
- 1/2 teaspoon cayenne pepper (optional, for a little heat)
For the Homemade BBQ Glaze (Optional but Recommended):
- 1 cup of your favorite BBQ sauce
- 2 tablespoons honey or maple syrup
- 1 tablespoon apple cider vinegar
- 1 teaspoon Worcestershire sauce
Equipment Needed:
- Large baking sheet
- Heavy-duty aluminum foil
- Small bowl for mixing the rub
- Basting brush
How to Cook Beef Chuck Riblets: Step-by-Step

This is where the magic happens. Follow these steps for the perfect baked beef ribs that will make this your go-to beef chuck riblets recipe.
Step 1: Prep the Ribs Preheat your oven to 300°F (150°C). Pat the beef riblets completely dry with paper towels. This is crucial for getting a good sear and helping the rub adhere. Some chuck riblets may have a tough, silvery membrane on the bone side. If you see it, slide a butter knife under an edge to lift it, then grab it with a paper towel and peel it off. Removing it allows the fat to render and the meat to become more tender. Drizzle the riblets with olive oil.
Step 2: Apply the Rub In a small bowl, combine all the BBQ rub ingredients. Generously coat all sides of each riblet with the mixture. Don’t be shy—this is your primary flavor base!
Step 3: The First Bake (Low & Slow) Place the seasoned riblets on a large sheet of heavy-duty aluminum foil, meaty side up. Lay another large sheet of foil on top and crimp the edges together tightly to create a sealed packet. This is the most critical step for tender slow cook beef ribs in oven. Place the foil packet on your baking sheet.
Bake for 2.5 to 3 hours. The goal is low, slow, and steamy.
Step 4: Make the Glaze While the ribs are enjoying their sauna, whisk together your BBQ sauce, honey (or maple syrup), apple cider vinegar, and Worcestershire sauce in a small saucepan. Simmer over low heat for 5-10 minutes for the flavors to meld. Set aside.
Step 5: Glaze and Finish Carefully open the foil packet (watch out for hot steam!). The riblets should be incredibly tender. To check, pierce the meat with a fork; it should go in with very little resistance. Increase the oven temperature to 400°F (200°C).
Gently brush a generous layer of the BBQ glaze over the top of the riblets. Return them to the oven, uncovered, for 10-15 minutes. You’ll see the glaze bubble and caramelize into a beautiful, sticky coating. For extra char, you can finish them under the broiler for 1-2 minutes, but watch them closely to prevent burning!
Recipe Variations & Other Cooking Methods
While this oven-baked beef chuck riblets recipe is fantastic, the cut is also suited for other methods.
Smoked Beef Chuck Riblets
Set your smoker to 250°F (122°C). Apply the rub as directed and smoke for 2-3 hours, spritzing with apple juice every hour. Wrap in foil or butcher paper and continue to cook until tender, another 1-2 hours. Glaze and finish as desired.
Slow Cooker / Crock Pot Method
Apply the rub and place the riblets in the slow cooker. Cook on low for 6-8 hours or on high for 3-4 hours until fall-off-the-bone tender. Remove them, place on a baking sheet, glaze, and finish under the broiler for a few minutes to caramelize the sauce.
Expert Tips for Success
- Don’t Skip Removing the Membrane: It’s a natural barrier that prevents flavor from penetrating and keeps the ribs from getting truly tender.
- Wrap Tightly: The key to this baked beef ribs method is trapping steam. A loose foil packet will let the moisture escape, resulting in dry, tough meat.
- Let Them Rest: This is a crucial, non-negotiable step. Once out of the oven, let the riblets rest for 5-10 minutes before serving. This allows the juices to redistribute throughout the meat for a more flavorful bite.
- Cook to Tenderness, Not Temperature: The best indicator of doneness isn’t a thermometer, but texture. When a fork or a toothpick slides into the meat with almost no resistance, your beef chuck riblets recipe is a success.
What to Serve with Beef Riblets
These rich, flavorful ribs pair perfectly with classic comfort food sides.
- Creamy Coleslaw
- Southern-Style Macaroni and Cheese
- Fluffy Cornbread with Honey Butter
- Garlic Mashed Potatoes
Frequently Asked Questions (FAQ)
Q: Can I use beef short ribs for this recipe? A: Yes, this method works well for beef short ribs too, but you may need to increase the initial baking time by 30-60 minutes due to their thickness. The core principles of the beef chuck riblets recipe still apply.
Q: How do I store and reheat leftover riblets? A: Store leftovers in an airtight container in the refrigerator for up to 3 days. To reheat, wrap them in foil with a splash of beef broth or water and warm in a 300°F oven until heated through.
Q: Can I make these ahead of time? A: Absolutely! You can perform the initial 2.5-3 hour bake a day ahead. Let them cool, store them in their foil packet in the fridge, and then glaze and finish in the oven just before serving.
Q: My riblets came out tough, what did I do wrong with this beef chuck riblets recipe? A: 99% of the time, tough ribs mean they weren’t cooked long enough. Beef chuck has a lot of connective tissue that needs ample time at a low temperature to break down. If they’re not tender, wrap them back up and put them back in the oven for another 30-45 minutes. Patience is a key ingredient in this recipe!
Did You Try Our Recipe?
There are no reviews yet. Be the first one to write one.